- Overview: Datio POS for Restaurants
- Step 1: Download and Set Up the Datio POS Restaurant App
- Step 2: Add and Configure Servers (Sales Associates)
- Step 3: Create and Save an Order
- Step 4: Printing the Kitchen Order
- Step 5: Retrieve a Saved Order
- Step 6: Review the Order Total
- Step 7: Collect Payment from the Table
- Step 8: Process the Payment
- Split Payment Options
- Step 9: Adjust and Enter Tips
- Step 10: Close the Batch (Daily Requirement)
Overview: Datio POS for Restaurants
This document is a quick tutorial on using Datio POS Restaurant. The application works with our credit card processing; contact Vantiv at 800-846-4472 to set up. You can also bring in your existing processing using Terminal Credit.
Just a reminder: our Datio POS App for Quick Serve and Retail works with our credit card processing or any terminal from your favorite provider.
- Restaurant version: Supports saved orders and tipping on the receipt
- Quick Serve & Retail version: Tip is done on the screen and does not allow saved orders
Step 1: Download and Set Up the Datio POS Restaurant App
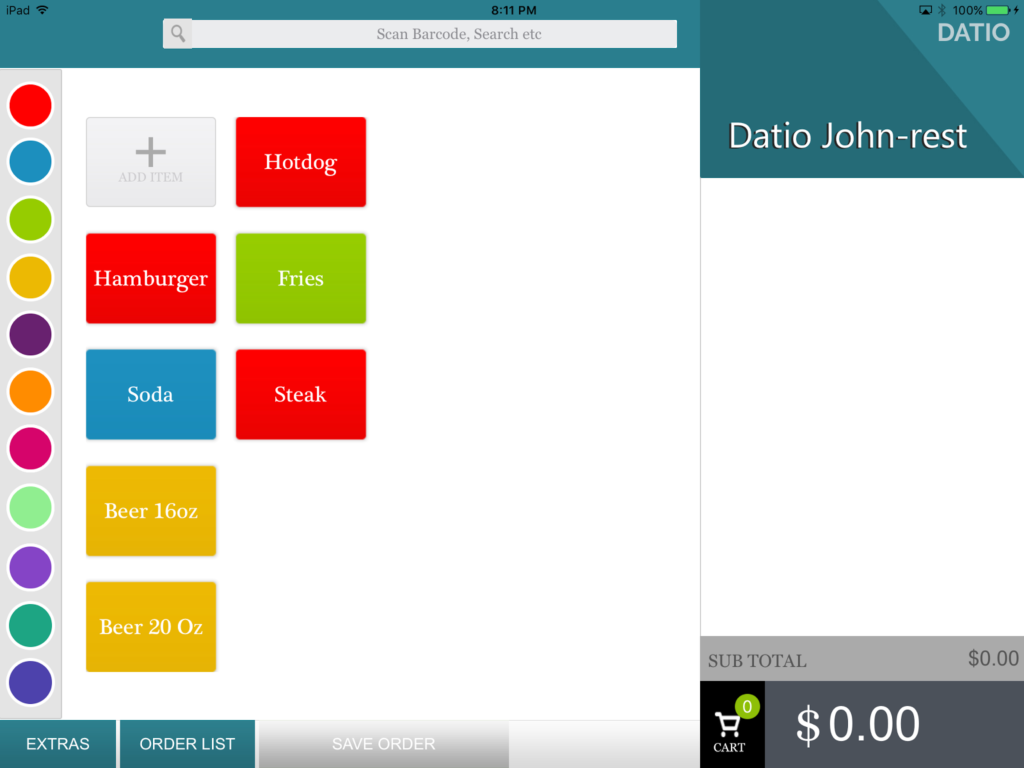
Okay, let’s get down to business. Download the Datio POS Restaurant App.
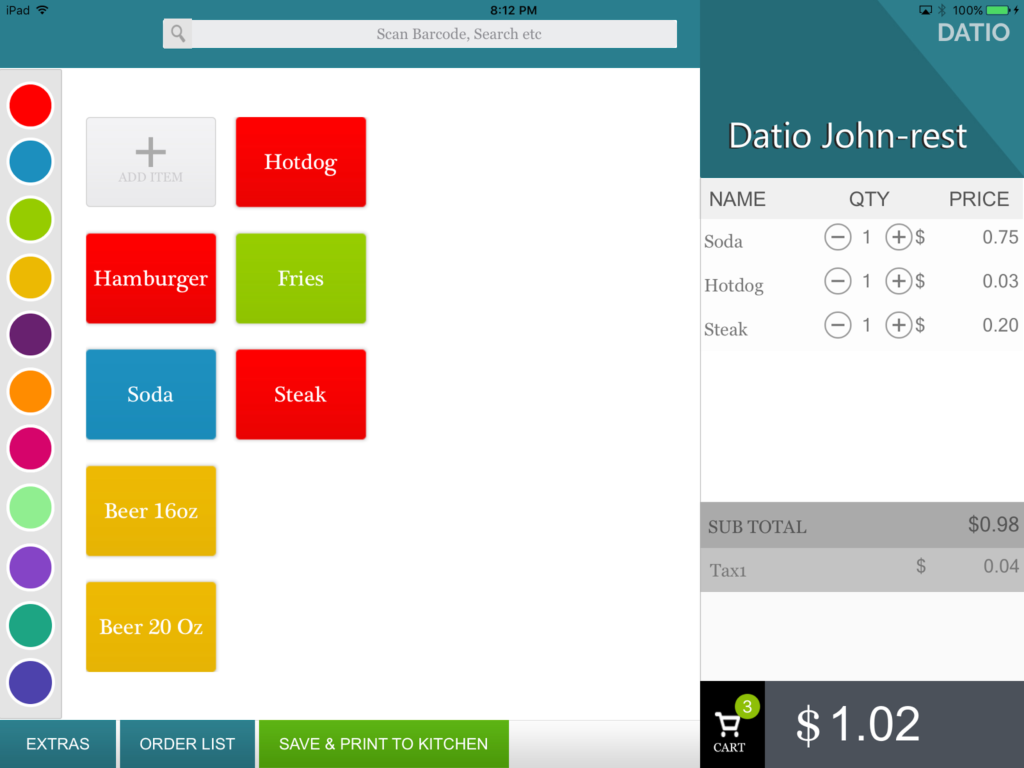
To add items, simply click on the big “+” on the home screen and enter a few products.
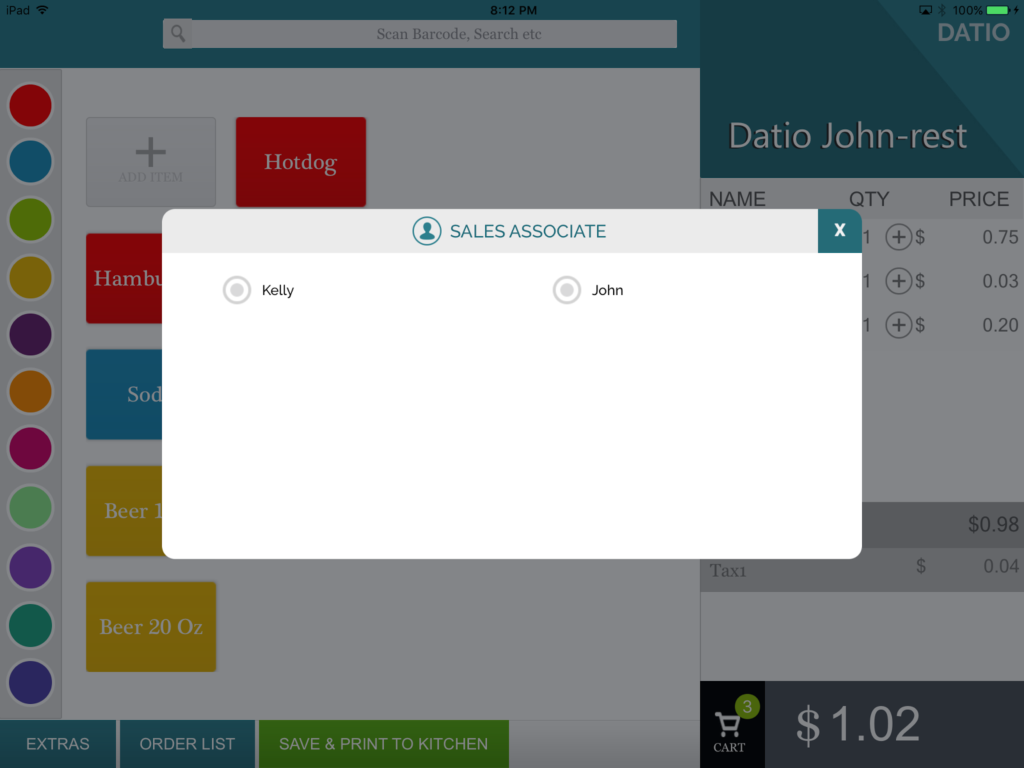
Step 2: Add and Configure Servers (Sales Associates)
Now that you have items set up, let’s configure your servers.
Go to:
EXTRA → CUSTOM SETUP → SALES ASSOCIATE
In this example, servers Kelly and John were added.
- If you enter their mobile numbers, they will receive a text message for each tip
- If you don’t want this feature, simply leave the mobile number blank
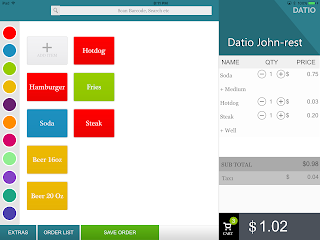
Step 3: Create and Save an Order
After adding items to the cart, select SAVE ORDER at the bottom of the screen.
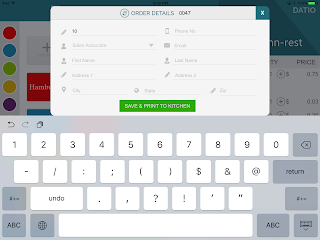
You will now see the order details screen. All fields here are optional:
- Table number for dine-in tracking
- Delivery or takeout address and phone number
- Server selection (can also be selected later)
For fastest operation, skip entering details and simply select SAVE & PRINT TO KITCHEN.
Step 4: Printing the Kitchen Order
The kitchen order will print automatically.
- You can print locally using the base station
- Or set up a LAN printer in the kitchen
After printing, you’ll return to the home screen.
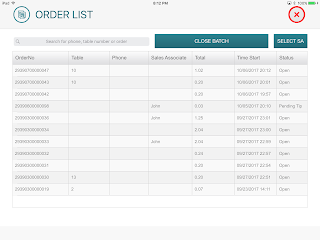
Step 5: Retrieve a Saved Order
From the home screen, select ORDER LIST.
Choose the most recent order—it should appear at the top of the list.
You’ll now see the order details again on the home screen.
Step 6: Review the Order Total
Select the TOTAL displayed at the bottom (for example, $1.02).

You will be prompted to:
- Select the Sales Associate (Server)
- Access the payment options
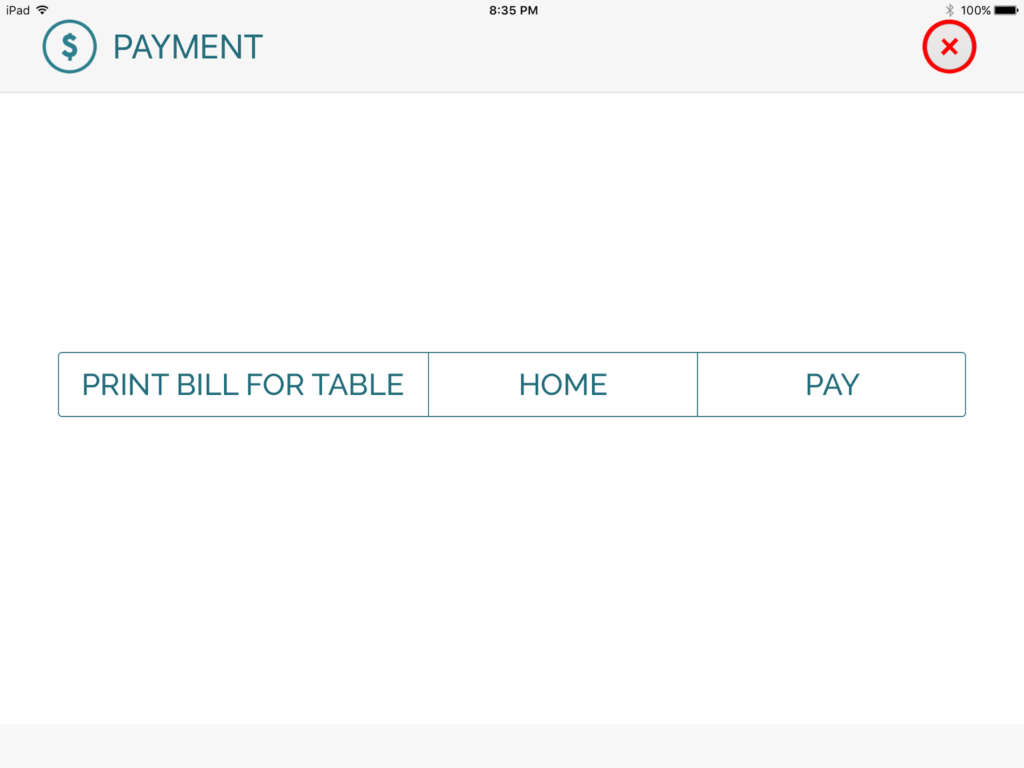
Select the server, then choose PRINT BILL FOR TABLE, and return to the home screen by selecting HOME.

Step 7: Collect Payment from the Table
The server gives the printed bill to the table and collects the credit card.
Once back at the home screen:
- Go to ORDER LIST
- Select the order
- Tap the TOTAL ($1.02) again to proceed with payment

Step 8: Process the Payment
On the payment screen, select PAY, then choose CREDIT.
Split Payment Options
- For simple splits (2, 3, or 4 ways): select the option and process each payment
- For multiple or uneven splits: enter a partial amount and select CASH or CREDIT
- The payment screen will repeat until the remaining balance is zero
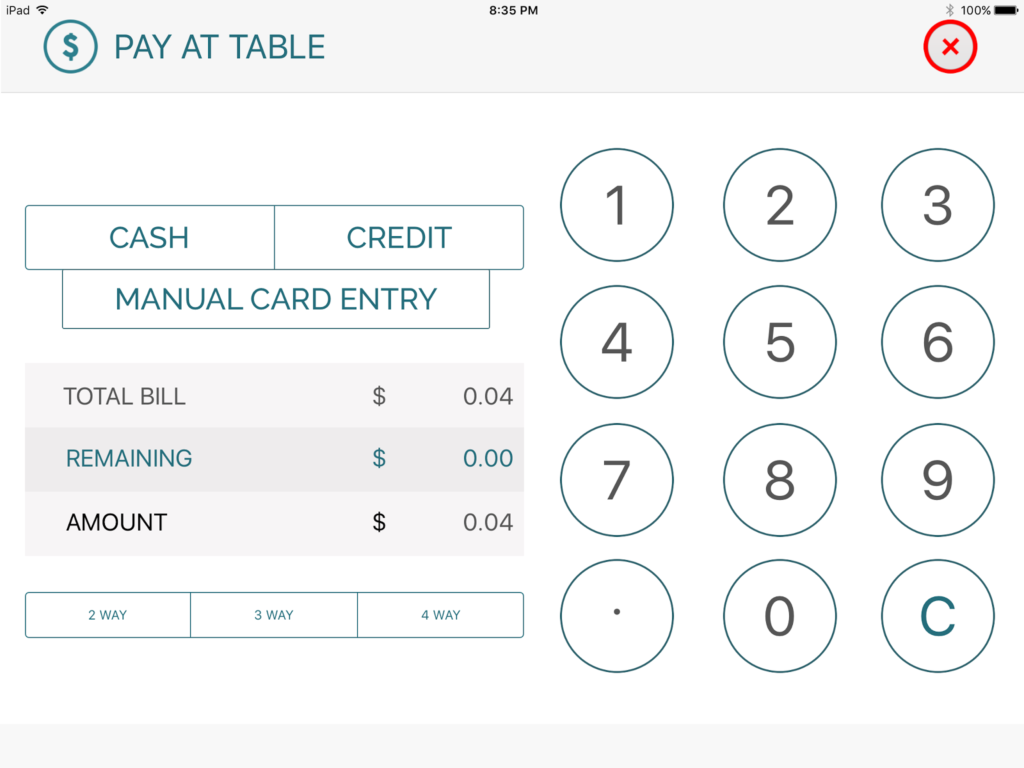
After swiping the card, the system prints:
- Customer copy
- Merchant copy
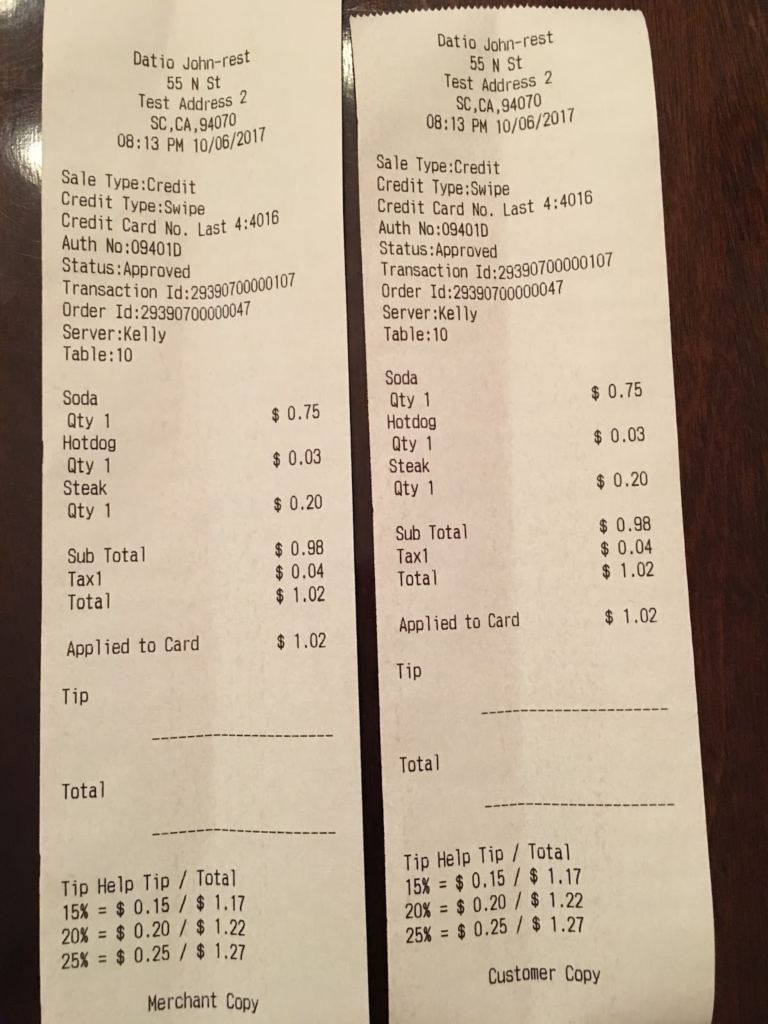
Have the customer sign and add the tip on the merchant copy.
Step 9: Adjust and Enter Tips
This step is critical. Tips must be entered before closing the batch.
From ORDER LIST:
- Select orders marked PENDING TIP
- Enter the tip amount
- For orders with no tip, you must enter $0.00 or the batch cannot be closed

You can update tips as they come in or all at once at the end of the day.
Step 10: Close the Batch (Daily Requirement)
The final step is to CLOSE BATCH, which is done from the ORDER LIST.
Important reminders:
- You cannot close the batch if any orders are marked PENDING TIP
- Close the batch once every day (late night or early morning is fine)
- If a batch remains open for more than 2.5 days, it will close automatically and all tips will be set to $0.00
👉 Always close the batch daily to ensure tips are properly processed.